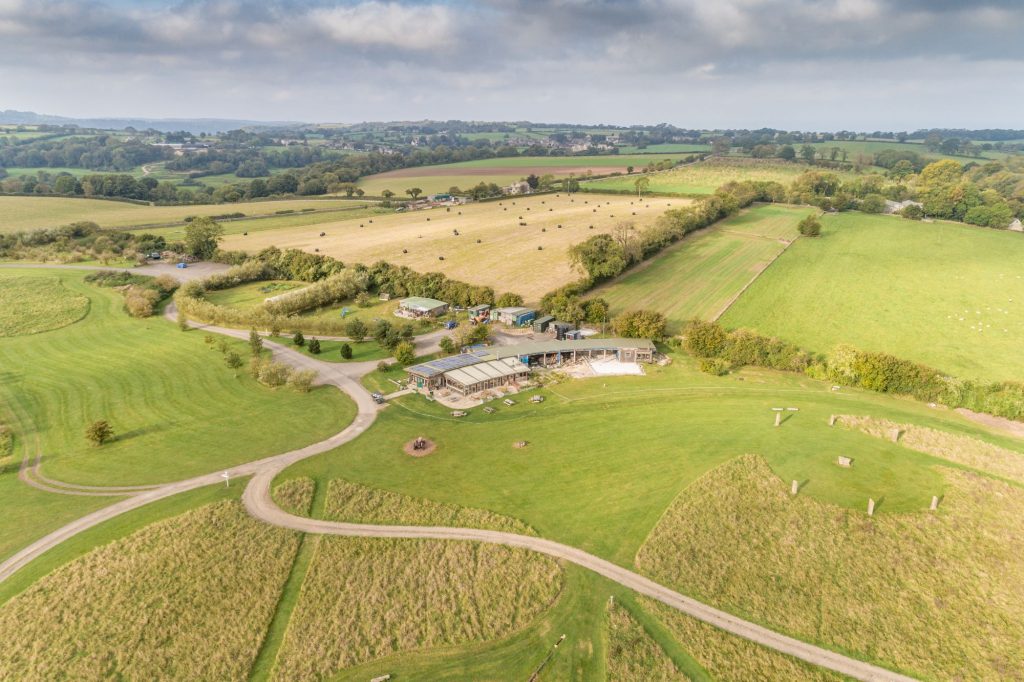
Aerial photography has become increasingly popular in recent years, and drone cameras have played a significant role in this trend. Drone cameras are small, lightweight cameras that are built in to drones or can be mounted to them to capture images and videos from unique vantage points. The rise of drone technology has made it easier than ever for photographers and videographers to access aerial photography, and as a result, the demand for this type of content has soared. However, to get the best results from aerial photography, it’s important to understand the features and settings of your drone camera. Knowing how to adjust the camera settings and compose your shots can make all the difference in the quality of your images and videos. With this guide, you’ll gain a solid understanding of drone cameras and how to use them for aerial photography. Whether you’re a beginner or an experienced aerial photographer, the tips and insights provided in this guide will help you capture stunning images.
Types of Drone Cameras
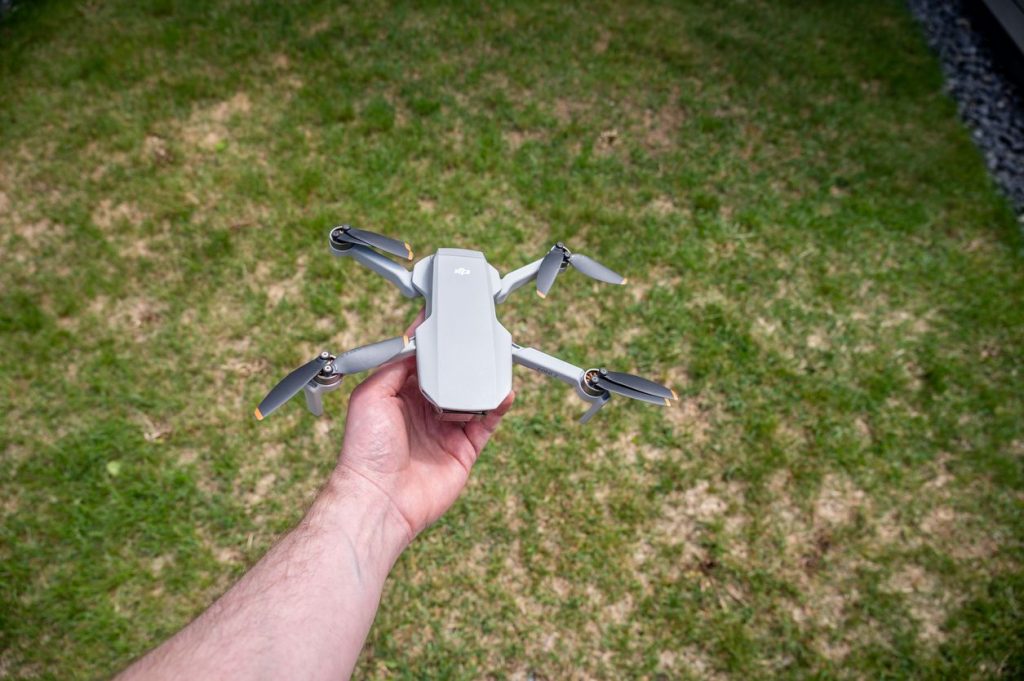
There are two main types of drone cameras used for aerial photography: built-in and attachable cameras. Built-in cameras are integrated into the drone itself, like in the DJI Mini 3 Pro, and Mavic 3 Pro drones, while attachable cameras can be mounted onto the drone such as with DJI’s Inspire drones and Zenmuse cameras. These are becoming less popular as UK drone regulations push drone operators towards smaller and lighter (and therefore safer) drones.
Built-in cameras are generally more convenient as they are already attached to the drone, meaning that the drone itself is usually smaller and lighter, and requires less setup time. DJI’s foldable Mini 3 Pro for instance can be stored inside a sling bag complete with controller and batteries and be deployed within minutes. However, built-in cameras typically have a lower image and video quality compared to attachable cameras, and are sometimes less flexible in terms of adjusting the camera settings.
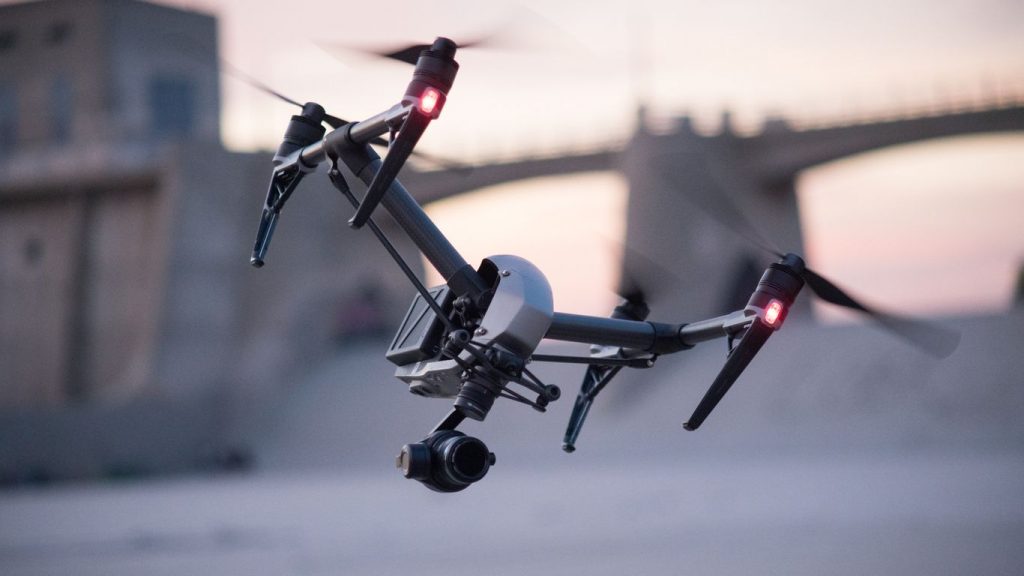
Attachable cameras, on the other hand, offer more flexibility and higher quality, but they require additional setup time and can result in a heavy, and large drone. This can also put the drone itself into a more highly regulated category of flight. Attachable camera drones allow you to use a variety of lenses and sensors such as the Zenmuse X5s and DJI’s flagship X7, and to adjust the camera settings in fine detail, which makes them more suitable for experienced and professional photographers and videographers who demand the highest image quality. Attachable cameras also have the advantage of being interchangeable, so you can upgrade or change the camera and lens based on your needs.
In summary, if you’re new to aerial photography and on a budget, a drone with a built-in camera, and in particular DJI’s Mini 2 and 3 drones may be a good starting point. If you’re looking for the most advance features and highest image quality, then an attachable camera such as DJI’s X5S and X7 for the Inspire 2 drone may be a better option. Whatever your choice, it’s important to understand the advantages and disadvantages of each type of drone camera, so you can choose the best option for your aerial photography needs.
Drone Camera Specifications
When it comes to aerial photography, the camera specifications that matter most are resolution, and sensor size. These features are essential in determining the quality of the images captured.
Resolution is the number of pixels in the image, which determines how clear and detailed the image is. The higher the resolution, the more detailed the image will be, allowing you to see fine details and capture more information. For aerial photography, it’s important to choose a camera with a high resolution to capture the full beauty of the scenery and to be able to crop and enlarge images without losing too much detail. DJI’s Mini 3 Pro is a lightweight, easy to use drone but the trade off is the relatively low 12MP image resolution (ignore the 48MP claim!). At the other end of the scale the Zenmuse X7 camera offers up 24MP and there are even drones available that can mount a 61MP Sony A7RIV camera.
Camera sensor size is another important factor in determining the quality of images and videos captured by a drone camera. The camera sensor is responsible for capturing the light that enters the camera and converting it into an image. A larger sensor size means that more light can be captured, resulting in a higher quality image with better dynamic range, sharpness, and often better color reproduction. In aerial photography, having a larger sensor size can be especially beneficial as it allows you to capture more detail in the landscape and improve the overall image quality. However, larger sensor sizes also usually mean a larger and heavier drone to carry that camera around with, which can impact on the restrictions placed on where and how you can fly your drone. So, when selecting a drone camera for aerial photography, it’s important to consider the sensor size and balance it against other factors such as camera features and weight. A drone that offers an excellent balance between sensor size, weight, and portability is the Mavic 3 Pro, with its Micro 4/3 sensor and compact folding design.
In summary, understanding camera features is essential for achieving high-quality aerial photography. Choosing a camera with the right resolution, sensor size, and aperture for your needs can make all the difference in the quality of your images. So, take the time to consider these features carefully when selecting a drone camera for aerial photography.
Aerial Photography Camera Settings
Adjusting the camera settings is crucial to achieving the best results from your aerial photography. The key camera settings to adjust are shutter speed, ISO, apeture (if your drone has this option) and white balance, which can significantly affect the quality of the images captured. Shutter speed, aperture, and ISO make up what is known as ‘the exposure triangle’.
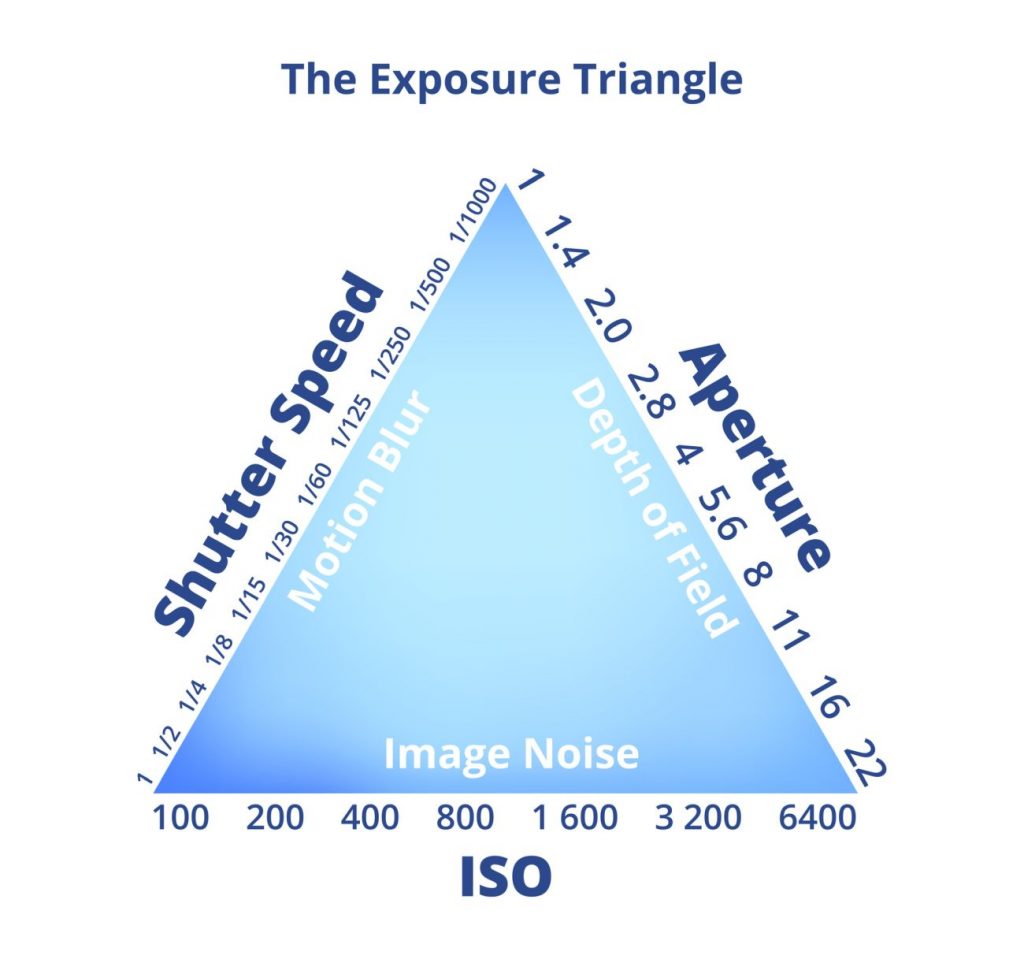
Shutter speed controls the length of time the camera’s sensor is exposed to light, which affects the sharpness and motion blur in images. A faster shutter speed is ideal for capturing sharp and crisp images of fast-moving objects or in bright light conditions, while a slower shutter speed is ideal for capturing motion blur and a sense of movement in the image, or images in low light conditions.
ISO determines the sensitivity of the camera’s sensor to light, which affects the brightness and noise in images. A higher ISO is ideal for capturing images in low light conditions, but introduces ‘noise’ into your photos seen as a grainy affect, while a lower ISO is ideal for capturing images in bright light conditions. Always aim to capture your images at ISO100 for the cleanest looking photos.
White balance adjusts the color temperature of the image, which affects the overall color balance. Setting the white balance correctly is essential to ensure that the colors in the image are accurate and realistic. You can use the white balance settings to adjust the color temperature to suit the lighting conditions, such as sunny or cloudy.
Aperture controls the amount of light that enters the camera, which in traditional photography affects the depth of field and brightness of images. A larger aperture allows more light to enter the camera, creating a shallower depth of field and a brighter image. This is ideal for capturing images in low light conditions or when you want to isolate a specific subject. A smaller aperture allows less light to enter the camera, creating a deeper depth of field and a darker image. This is ideal for capturing images in bright light conditions or when you want to capture a wide-angle view. Many of the popular lightweight drones have what is known as a fixed aperture, which is usually fairly ‘wide open’ to allow plenty of light to hit the sensor. DJI’s Mini 3 Pro for instance offers a fixed aperture of f/1.7 whereas DJI’s Zenmuse X5S camera has an adjustable aperture which ranges depending on the lens attached to the camera. A wide open aperture does not equal shallow depth of field in drone photography, where even at f/1.7 you will find more or less the whole landscape in focus.

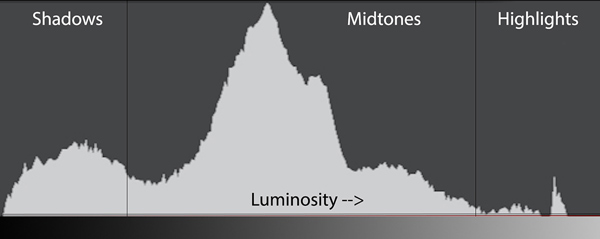
To nail these settings it’s essential to switch on your histogram, a little diagram of a mountain in a square box. The right edge of the box represents the brightest parts of the image and the left side represents the darkest part. Ideally you should not have any part of the mountain touching either edge of the box. The safest bet is to adjust your ISO, shutter speed, and aperture until your histogram is showing around the middle of the box.
In summary, adjusting the camera settings is an essential step in achieving high-quality aerial photography. By adjusting the shutter speed, ISO, aperture, and white balance settings to suit the environment and lighting conditions, you can capture images that are sharp, vibrant, and true to life. So, take the time to learn how to adjust these settings on your drone camera, and experiment with different combinations to find the perfect settings for your aerial photography.
Composition and Framing
Composition and framing are critical aspects of aerial photography, as they can make a significant difference in the quality of your images. A well-composed and framed shot can turn an ordinary scene into an extraordinary one, capturing the viewer’s attention and providing a unique perspective on the subject.
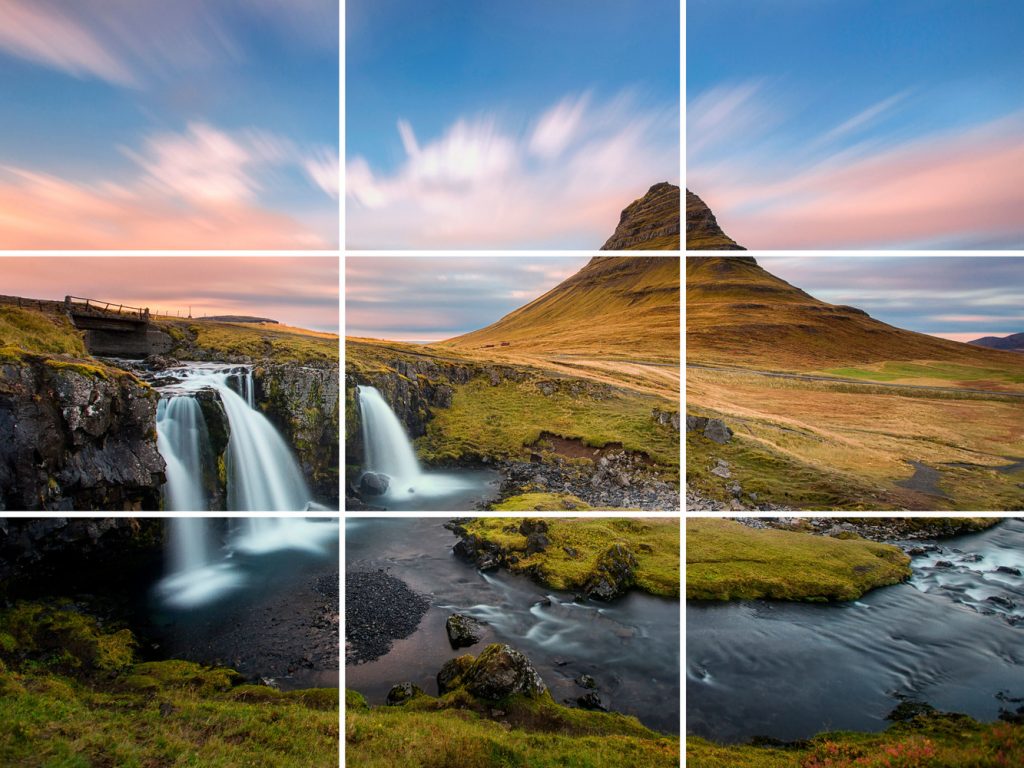
One of the key things to keep in mind when composing and framing aerial shots is the rule of thirds. The rule of thirds is a fundamental principle of composition that involves dividing the frame into three sections vertically and horizontally, resulting in nine equal parts. The idea is to place the subject of the photo on one of the intersecting points, rather than in the center of the frame, to create a more balanced and visually appealing composition. Most drones have a setting to switch a grid overlay on over the display of the controller so that you can correctly compose your shots.
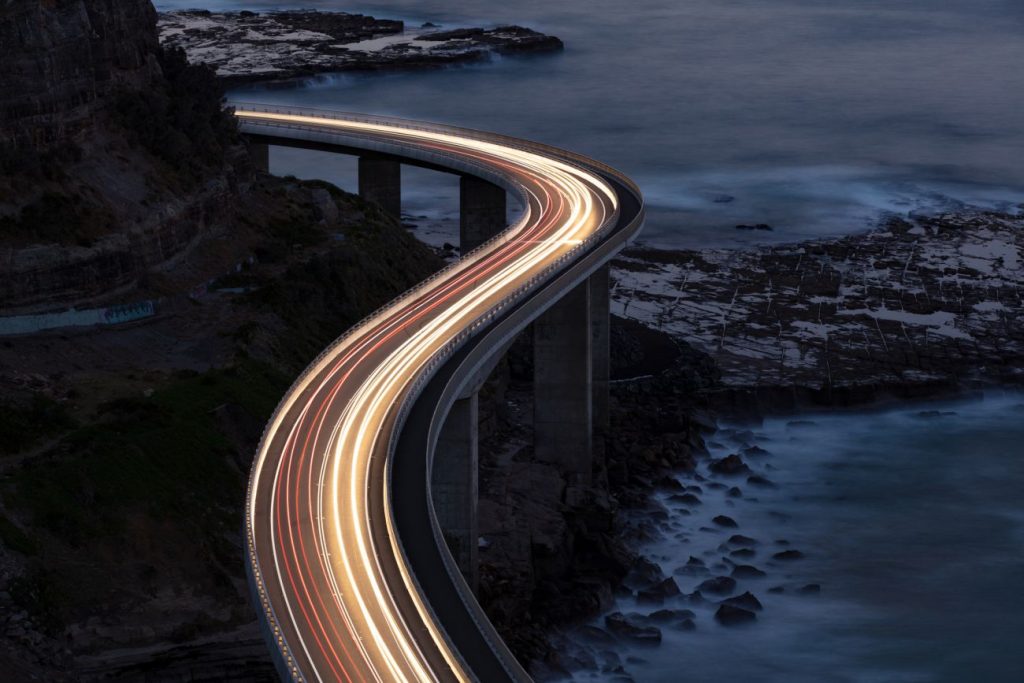
Leading lines are another important element to consider when composing aerial shots. Leading lines are structures or objects, natural or man-made that draw the viewers eye. They might draw the eye towards the subject or simply through the image but they’re one way of making otherwise potentially bland aerial photography look visually interesting.
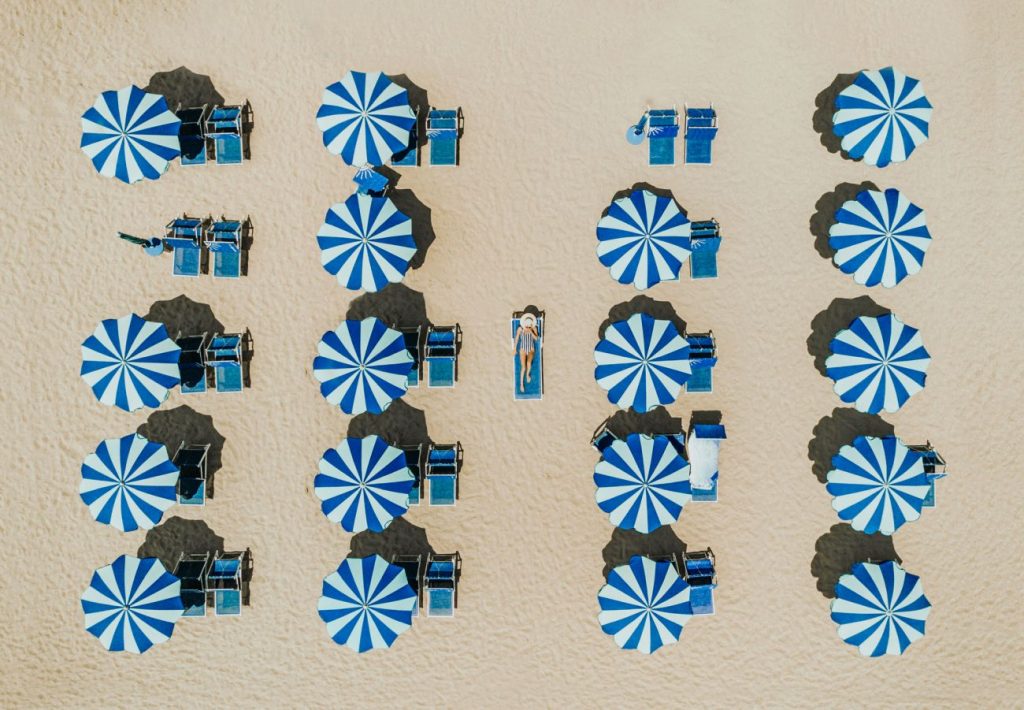
Symmetry is another powerful composition technique that can be used to provide interest to your aerial photography. Just like it sounds, a symmetrical shot involves capturing a visually balanced subject. It’s important to note that the symmetry does not need to be exact but it needs to give the general feel of balance within the image.
In summary, if you want to take your aerial photography beyond the inane then you would do well to learn about, and consider composition and framing in your next shoot. By applying the rule of thirds, leading lines, and symmetry, you can create visually stunning and unique shots that stand out from the crowd. I would advise taking the time to experiment with these composition techniques, and don’t be afraid to take 100 mundane photos to capture that one stunning shot, this is by far the quickest way to learn. With practice, you’ll develop a keen eye for capturing stunning aerial photography.
Legal and Safety Considerations
Using drones for aerial photography can be a rewarding experience, but it’s important to be aware of the legal and safety considerations, otherwise, you might find yourself in hot water. Failure to comply with regulations can result in serious consequences, both for yourself and others.
Before using a drone for aerial photography, it’s important to understand the regulations and requirements for operating drones in your area. In the UK most of the information can be find by searching the CAA Drone Code and tapping the location you wish to fly into a trusted drone airspace map and knowing how to read the results. Regulations can vary depending on the location and purpose of the flight, so it’s important to make yourself aware of the rules and be comfortable with following them.
The rules set down by your governing regulator may include avoiding flying over crowded areas, maintaining a safe distance from people and property, keeping the drone within line of sight, and not flying your drone further or higher than a certain distance. It’s also important to be aware of the different rules for different weights of drones. Visit our blog post for a quick run down on the rules for drones weighing less than 250g.
Other considerations to consider before using drones for aerial photography may include checking weather conditions, ensuring the drone is in good working condition, and respecting other people’s privacy by not invading their space by getting too close to their house or garden.
In summary, by staying up to date with regulations and safety guidelines, and taking steps to minimise risk, you can enjoy flying your drone and continue to elevate your aerial photography. Please don’t start flying drones without taking the time to research the regulations and safety guidelines in your area.
- Check the weather
- Check airspace restrictions
- Check your drone is in good working order
- Ensure you can maintain safe seperation distances
- Enjoy!
Conclusion
In this guide, we’ve covered everything you need to know about using drones for aerial photography. We’ve discussed the various types of drone cameras, camera specifications to look out for, the best camera settings, composition tips, and legal and safety considerations. By understanding the basics, you can make the most of your drone and get out there to capture stunning aerial photography.
Understanding the features and settings of your drone camera is crucial for achieving high-quality aerial photography. By selecting the right drone for you, adjusting the camera settings in manual mode, and using classic composition techniques, you can create images that are visually appealing, and well exposed.
By taking the time to learn about drones and aerial photography, you can unlock a new world of creative possibilities and capture stunning images from unique perspectives. So, if you’re a beginner on your aerial photography journey keep these tips and insights in mind as you head out with your drone and you will soon be capturing stunning images.